.png)
Creating new users from the Admin Panel
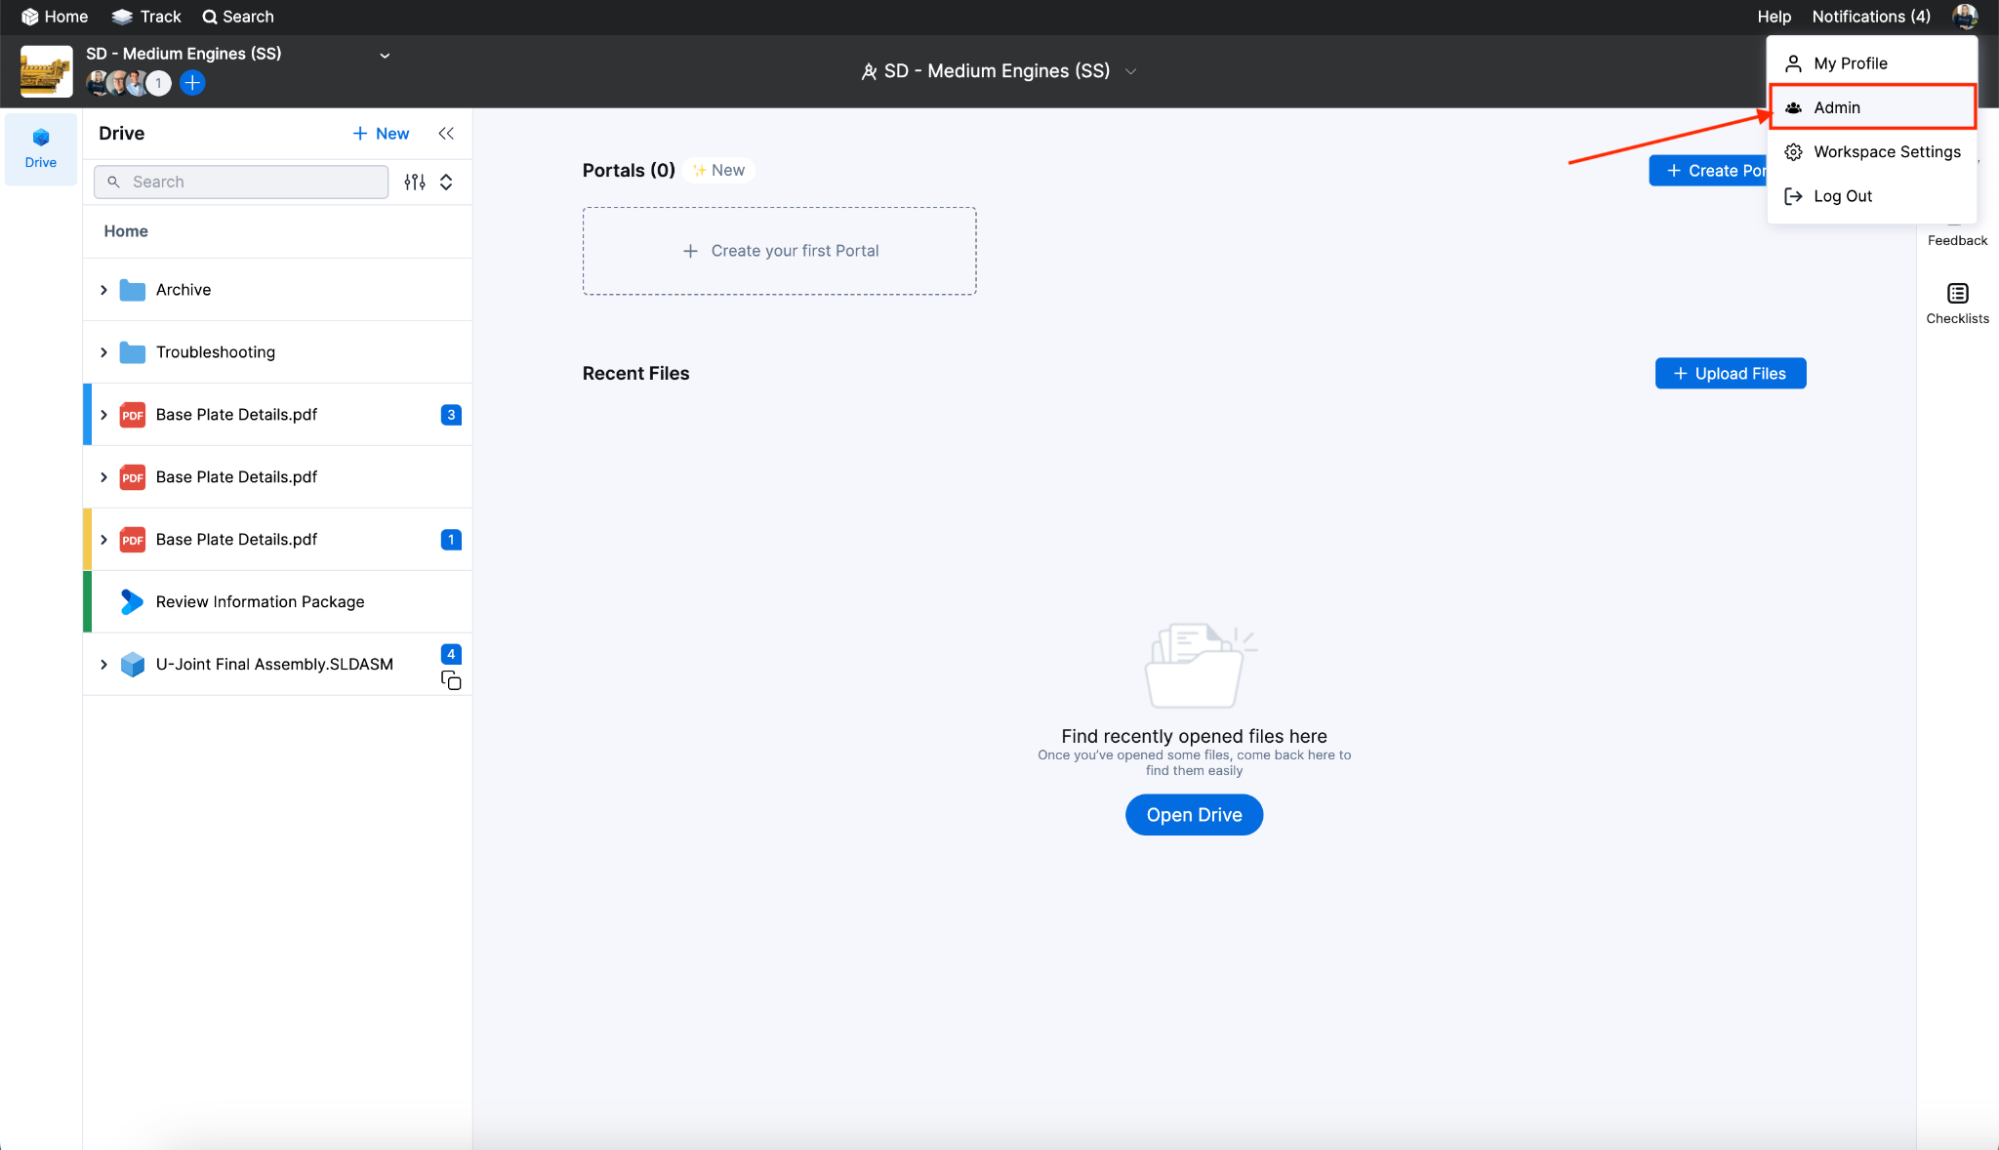
If you are a company admin, you can manage individual users in CoLab. To navigate to the user management page, click the profile icon in the top right corner and select ‘My Profile’ or ‘Admin.’
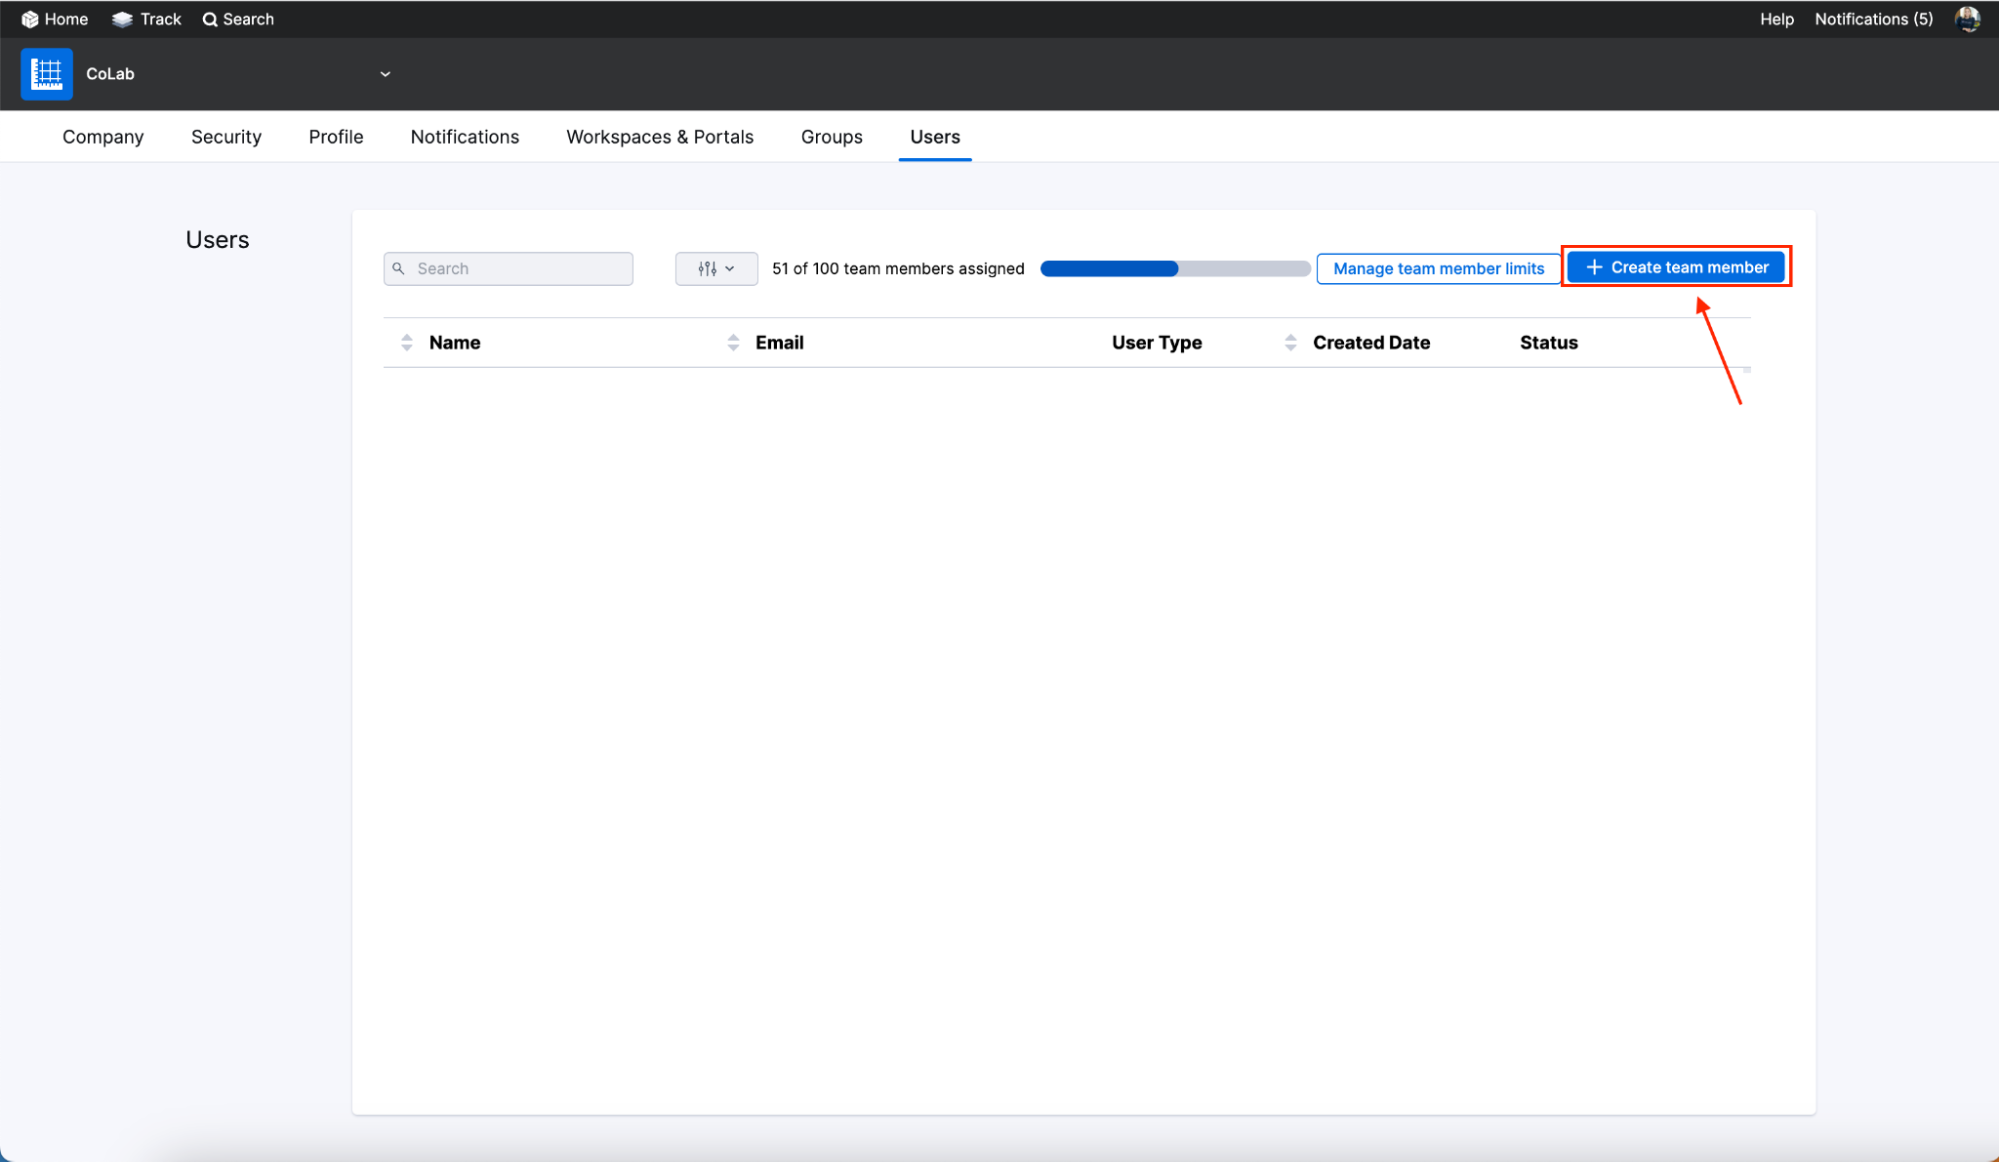
You will now see the user management page.
To create a new user, click the ‘Create Team Member’ button.
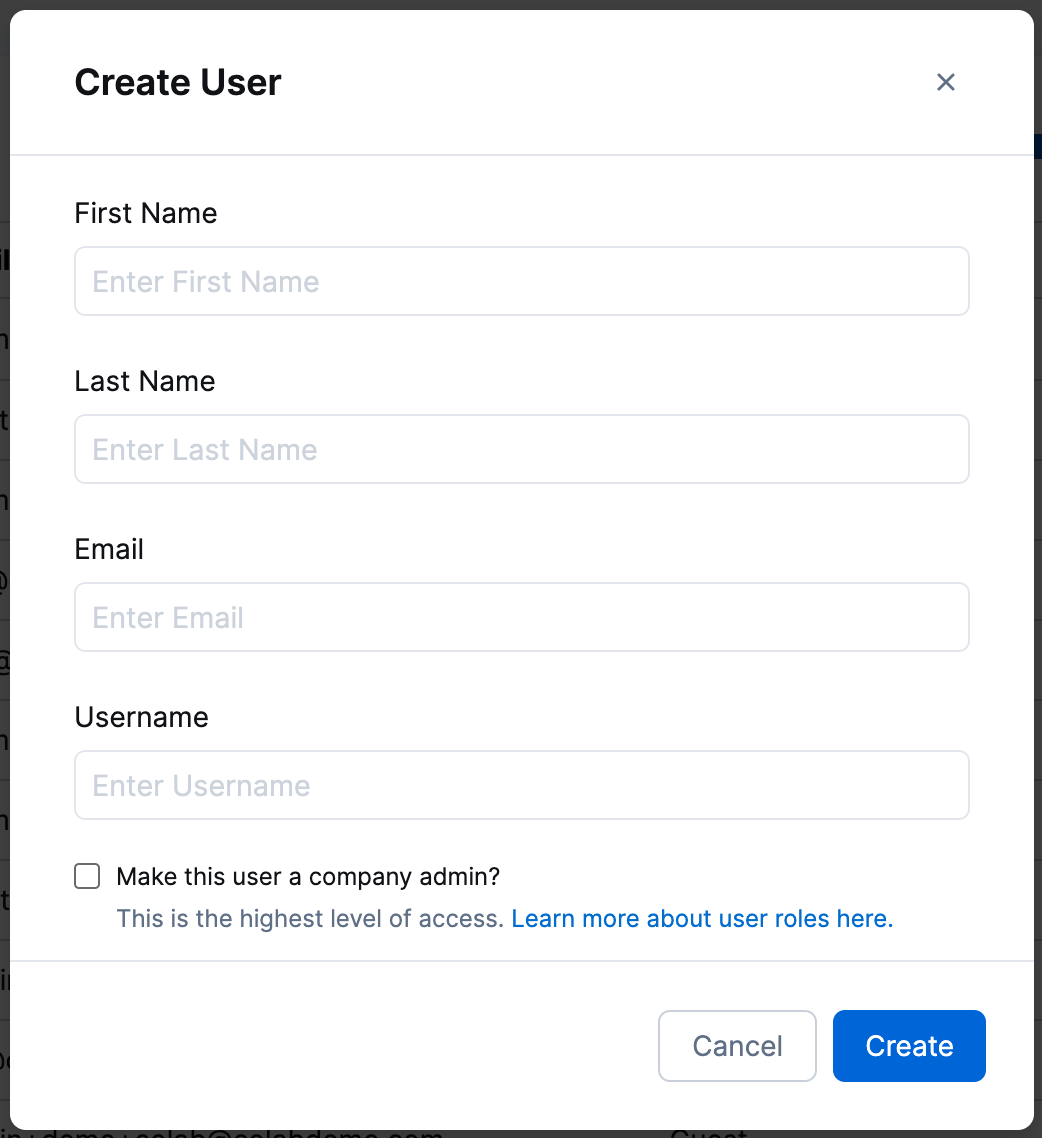
A modal will appear for you to enter the user’s name, email, username, and user role. Click ‘Create’ when finished.
You will see the entire list of users on the user management page. Other user-specific information displayed includes the user’s email, role, created date, and status.
Managing Users by Status
Note: Users with admin privileges will also have an Admin badge next to their name. Only team members can be admins.

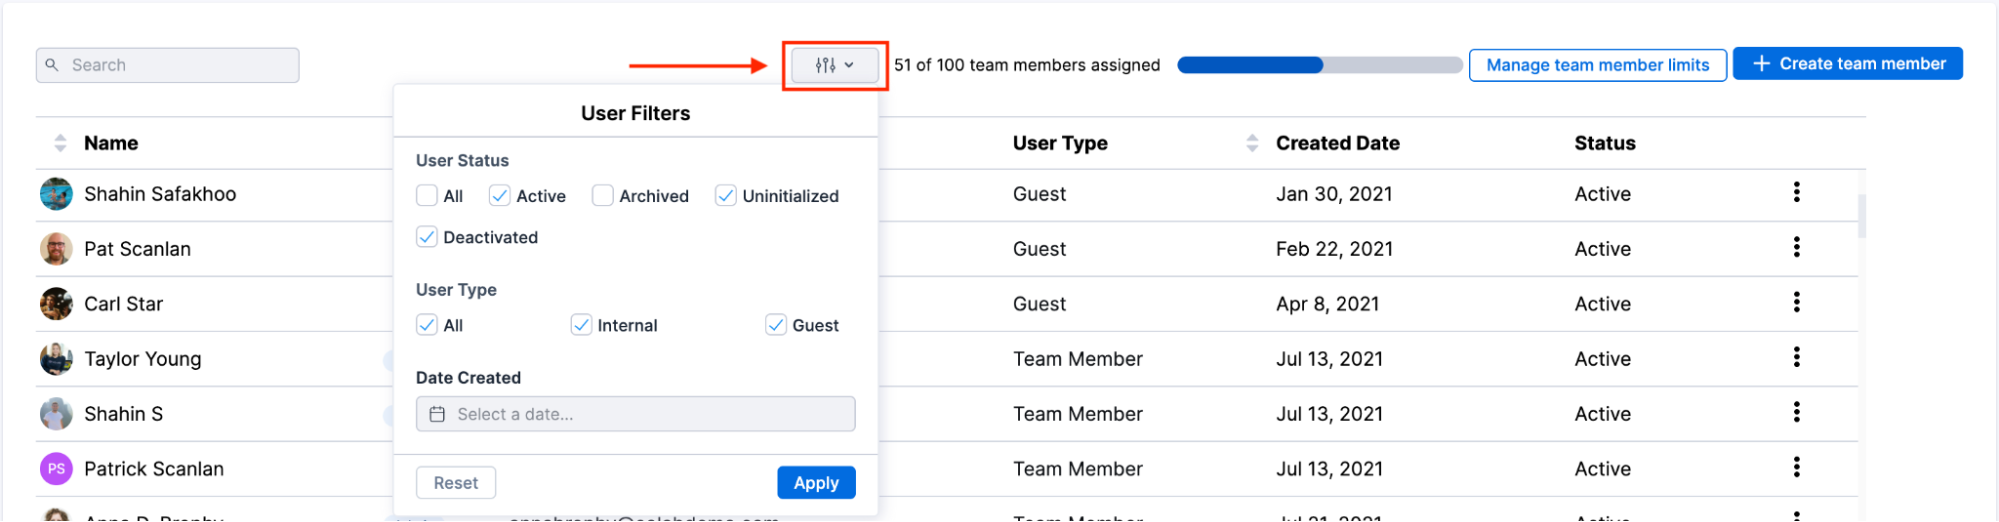
To manage individual users, click the kebab menu (three vertical dots) on the furthest right column of your manage users table.

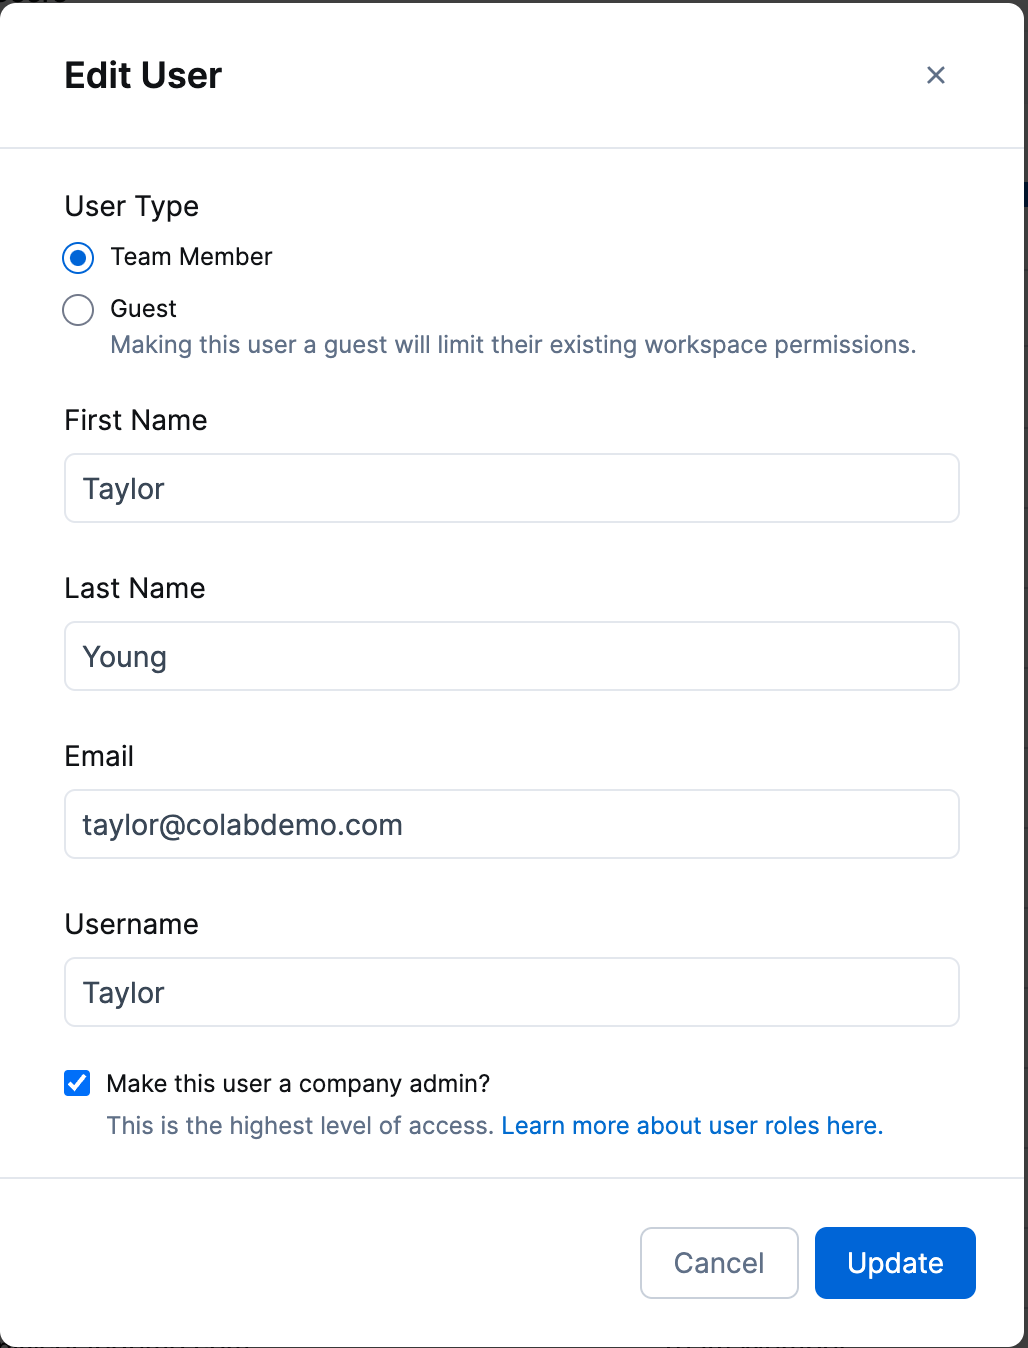
If you want to edit a user profile, you can update the user’s name, email, username, and user role.
You can search for users using the search bar and you can apply filters by selecting the filters icon, and choosing filters based on user status, user type, and date created.
Managing your team member limit
You can see the number of users assigned on the user management page and you can increase your user cap by clicking the ‘Manage Team Member limits’ button.

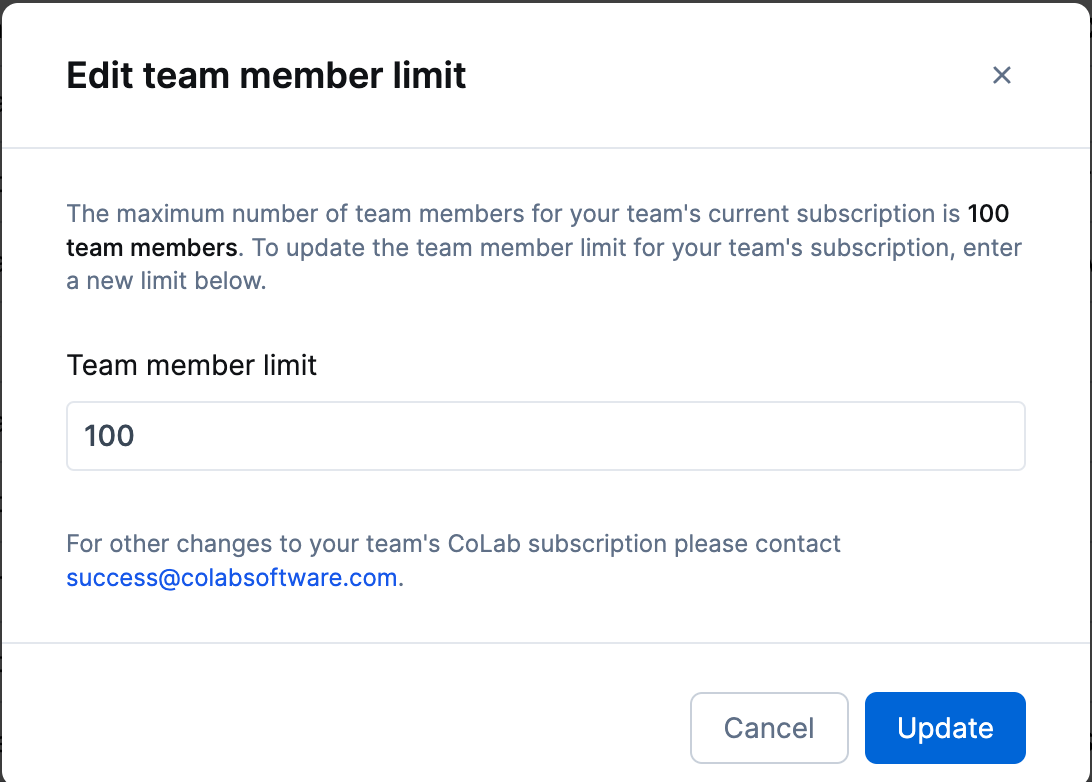
Note: Increasing your team member limit will affect your subscription - if you have any questions contact our support team.
Creating new Guest users from a Portal
Portal Admins can invite new Guest users to CoLab by sending the new users a Portal invite. There are two ways to invite new users to a Portal. Guest user invites do not affect your Team Member subscription level.
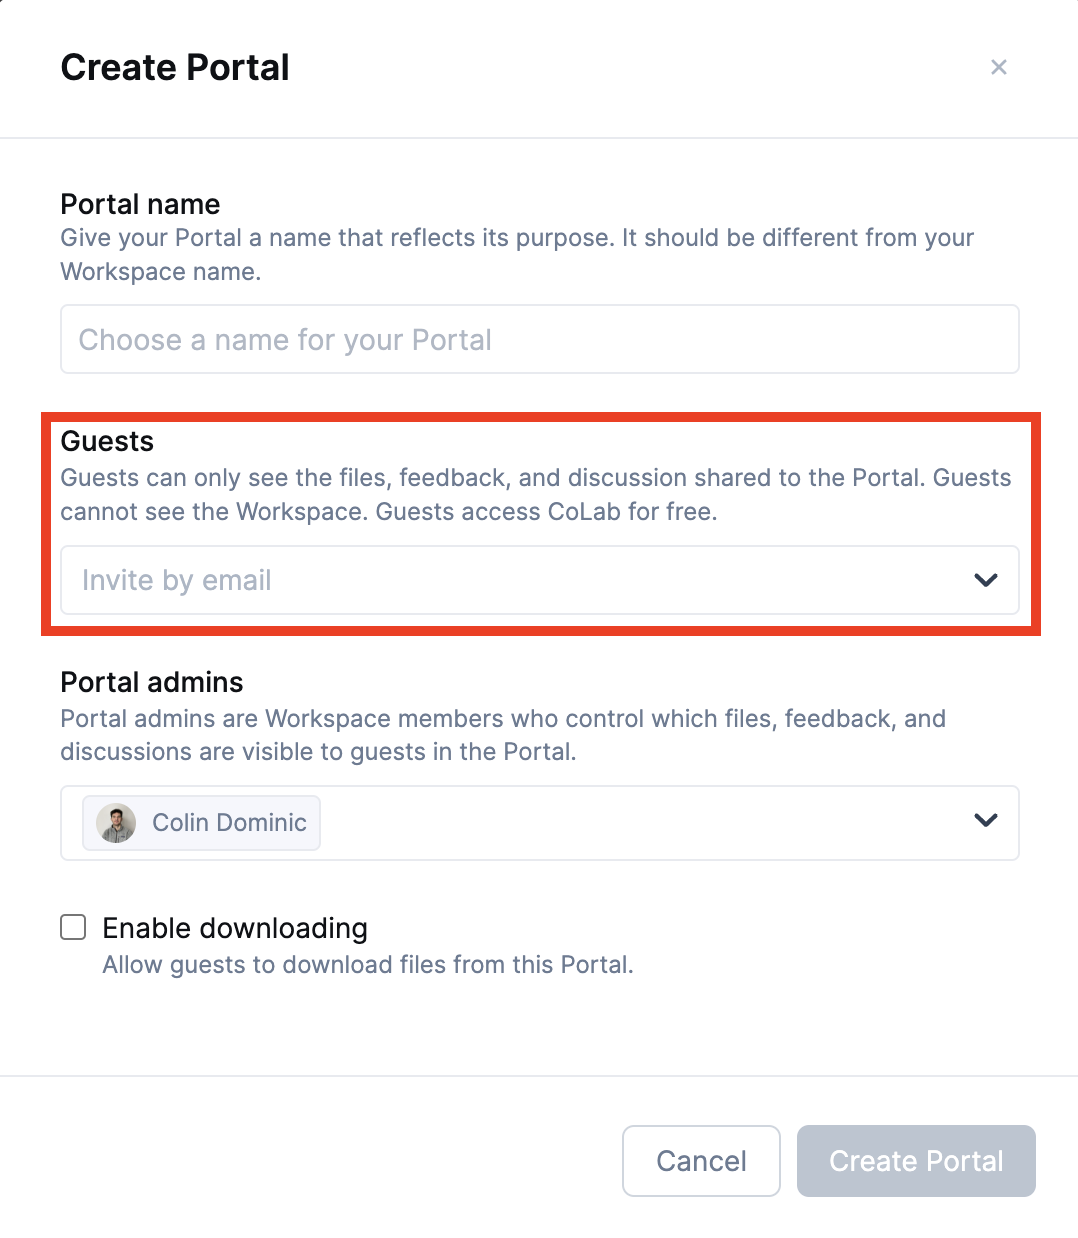
Option 1: At the creation of a Portal, you can add Guest user emails directly in the Create Portal modal.To invite new users through a Portal invite, select the ‘+icon’ in the top left of the Workspace.
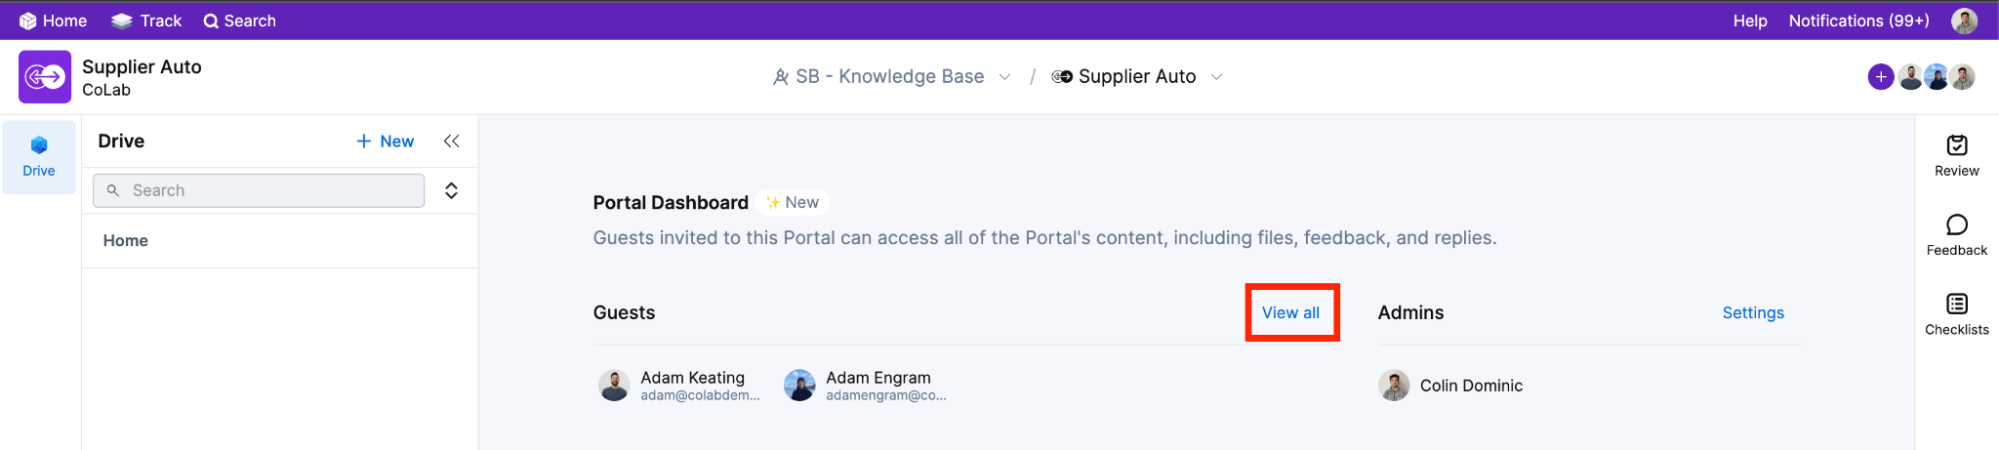
Option 2: In an existing Portal dashboard, click ‘View all’ in the Guests field.
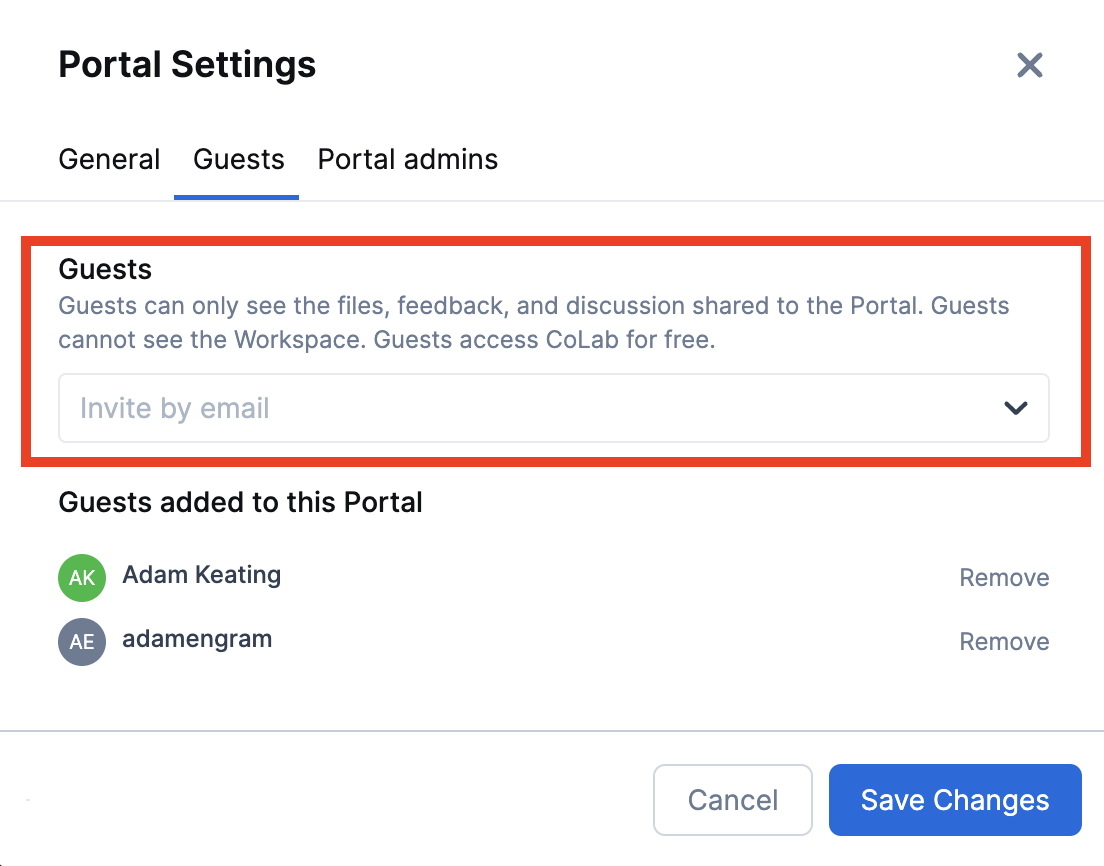
In the Portal Settings modal and under the Guests tab, you can add Guest user email addresses to invite them to the Portal.