.png)
This guide provides step-by-step instructions and best practices for leveraging the CoLab add-in within your Windchill environment, and explains how to control the data that users can upload to CoLab from Windchill.
The CoLab Windchill add-in allows you to push models and drawings directly from an active Windchill session into your CoLab Workspace. This allows you to immediately share design information in CoLab without having to leave the Windchill interface.
To start working with the CoLab add-in for Windchill, you need to log into CoLab via a new option in the Quick Links menu within Windchill. Access is limited to specific users. You must have a CoLab login as well as a Windchill account to be able to use the functionality. Within CoLab, users are only able to see the files within the Workspaces that they have access to.
The CoLab add-in is accessed in the Actions section of a Windchill file. From there, you can select ‘Share for Review’ to bring the Windchill file into your desired CoLab Workspace. Once the upload is complete, you can open the Workspace to view the file in CoLab.
When uploading assemblies, you will have the following options:
• Upload the version of the referenced components that were included in the most recent checked-in version of the assembly
• Upload the assembly with the most recent versions of the referenced components that are checked-in
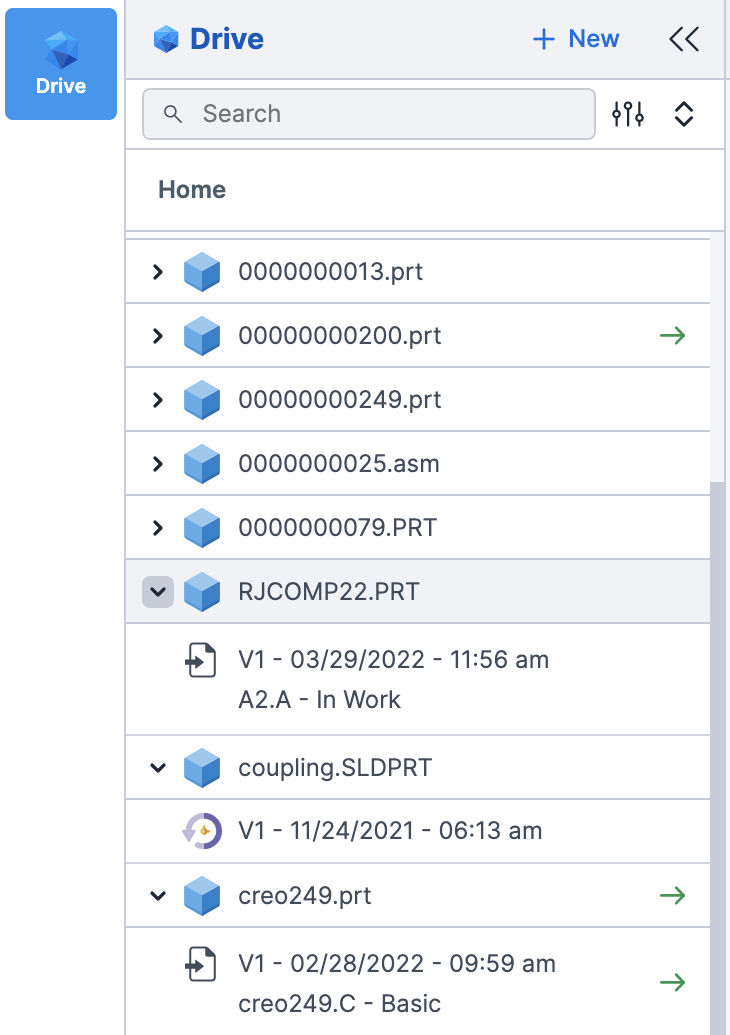
The version, revision, and state will be viewable in Drive.
To share a new revision of an existing file in CoLab, simply re-share the new revision to the same Workspace. CoLab uses an ID value from Windchill to determine that the file has already been uploaded to that Workspace, and will create it as a new revision instead of a separate file.
As a Company Admin, you control what gets uploaded to CoLab from Windchill. Here's how it works:
Admins define exclusivity or restriction rules based on specific attribute/value pairings under the Access Management tab in the Admin Panel. These rules dictate if a file originating from Windchill can or cannot be uploaded to CoLab by verifying the file’s associated attribute/value pairings.
*Before defining attribute rules, additional Windchill setup is required. Contact your Customer Success Manager to get started.
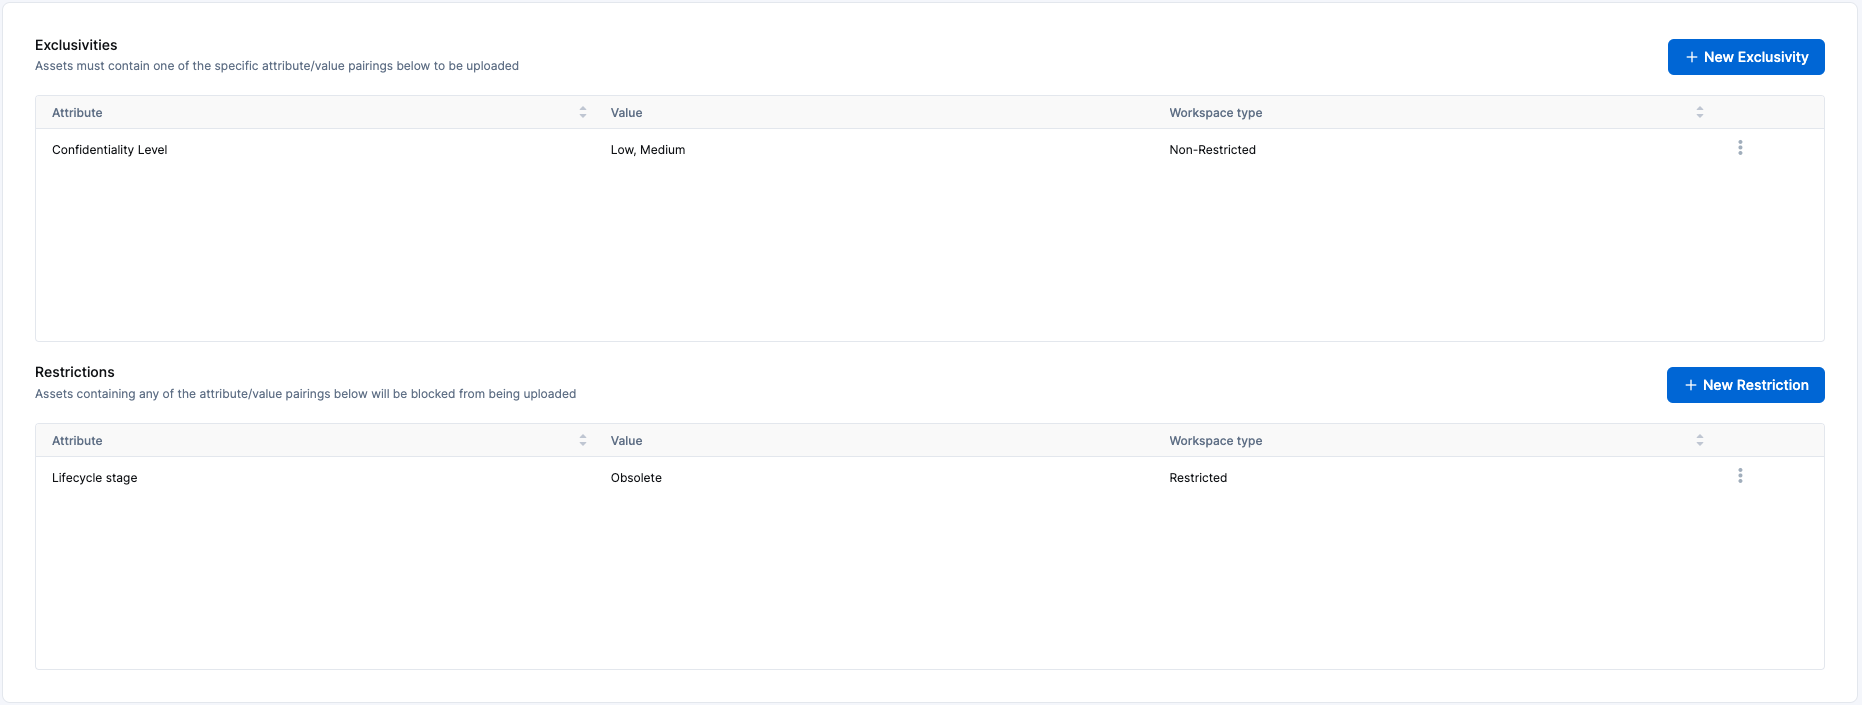
A file being uploaded must have an attribute/value pairing that is found on the exclusivity list. If it does, it can be uploaded, otherwise it will be blocked.
If a file being uploaded has an attribute/value pairing that is found on the restrictive list, it cannot be uploaded
In the example below, files must have a confidentiality level of low or medium to be uploaded to non-restricted workspaces, and files with a lifecycle state of obsolete can not be uploaded to restricted workspaces.
As mentioned above, the associated attribute/value pairings of a file are checked against the defined rules to ensure that that file can be shared to CoLab.
The associated attribute/value pairings of the file are first compared against the Exclusivities. If a match is found or no rules exist, the first phase of the check passes and moves onto the second phase. If rules exist but no match is found, the check fails and the file cannot be shared.
The associated attribute/value pairings of the file are then compared against the Restrictions. If no match is found or no rules exist, the second phase of the check passes and the file can be safely uploaded to CoLab. If rules exist and a match is found, the check fails and the file cannot be shared.
By going through this 2-step process, you can ensure that the attributes of a file are thoroughly checked before uploading it to CoLab. This gives you the confidence to upload files, knowing that the necessary checks are in place to maintain data integrity and accuracy.
When uploading a file originating from Windchill to a restricted workspace and that file meets one of the exclusivity rules, that file will be marked as restricted within the workspace. A restricted file is represented by a yellow shield alongside it’s file type icon.
If an admin wishes to un-restrict a workspace, that workspace must not contain any files marked as restricted. If the workspace still contains restricted data, admins will be blocked from un-restricting the workspace. This allows you to continue your work in the existing workspace without the need to archive it and create a new one.
Your Windchill Administrator will need to do a one-time installation of the add-in on the Windchill server where you would like CoLab to be available. This typically involves installing and testing the add-in in an integration environment as a first step. CoLab’s integration team will work closely with your IT team to complete the installation process. The add-in does not get installed on end user computers.
If there is a Windchill upgrade, the add-in needs to be updated by your Windchill Administrator. If there is an update to Windchill itself, no re-installation of the CoLab add-in is required.