.png)
In CoLab, a workspace is a place in CoLab where files are uploaded to be shared and reviewed with other CoLab users. Within workspaces, you can create reviews or packages for sharing. Workspaces can be organized by project, client, or other topics. Within a workspace, you can also create a folder structure to organize your uploaded files and reviews. It is advisable to standardize protocols around workspace creation, folder organization and nomenclature within your organization.
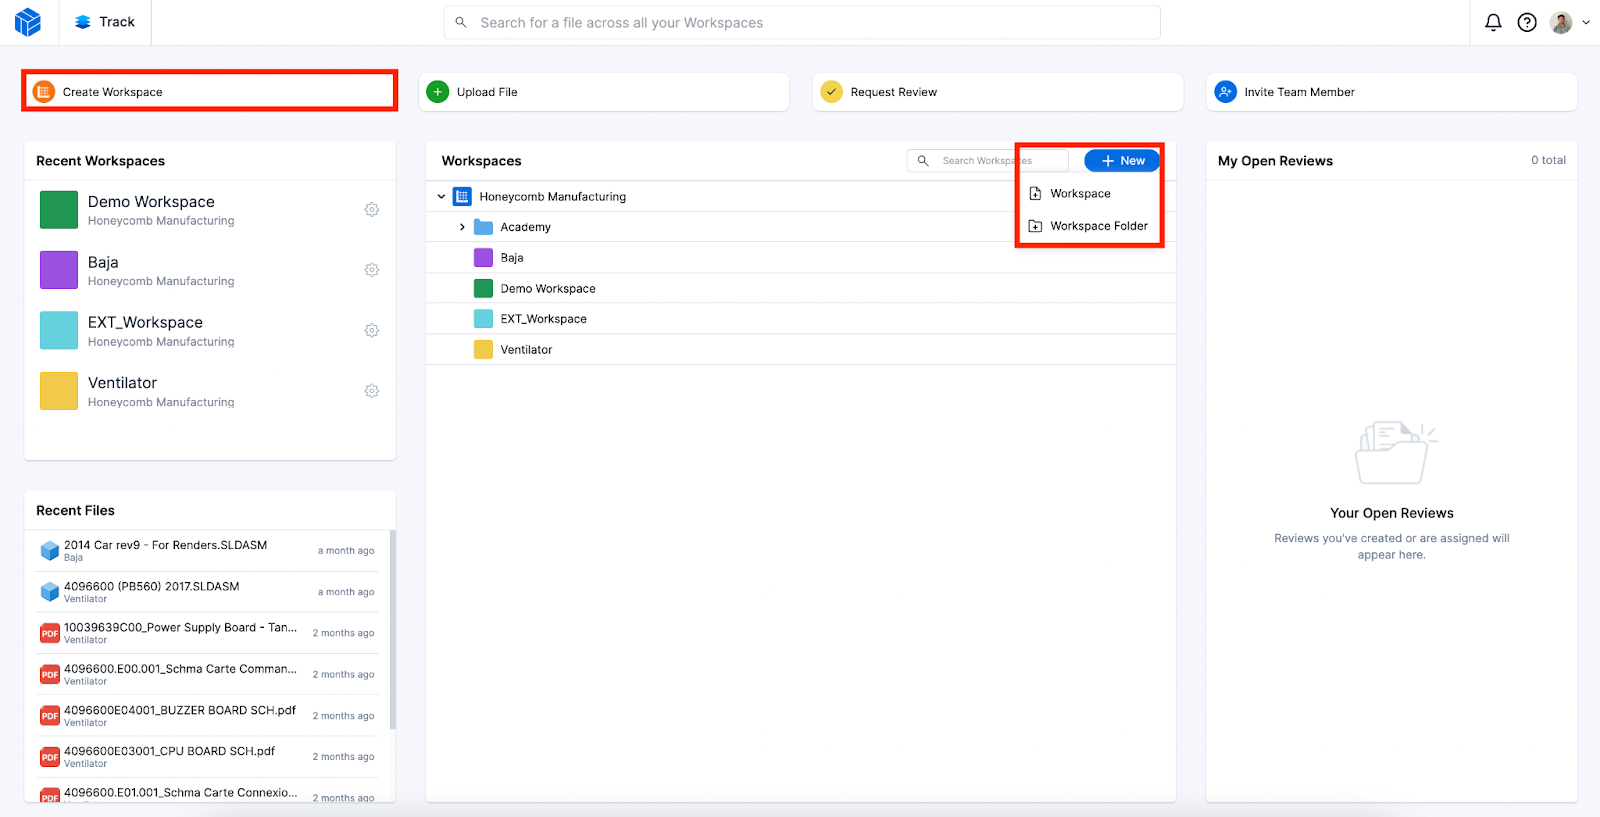
CoLab's Start Page is your homebase for creating and accessing your workspaces. From there, you can also access the Track tab. In this article, we’ll cover the following:
From the CoLab Start Page, click the ‘Create Workspace’ button or the ‘+ New’ button and select ‘Workspace’ from the dropdown list.
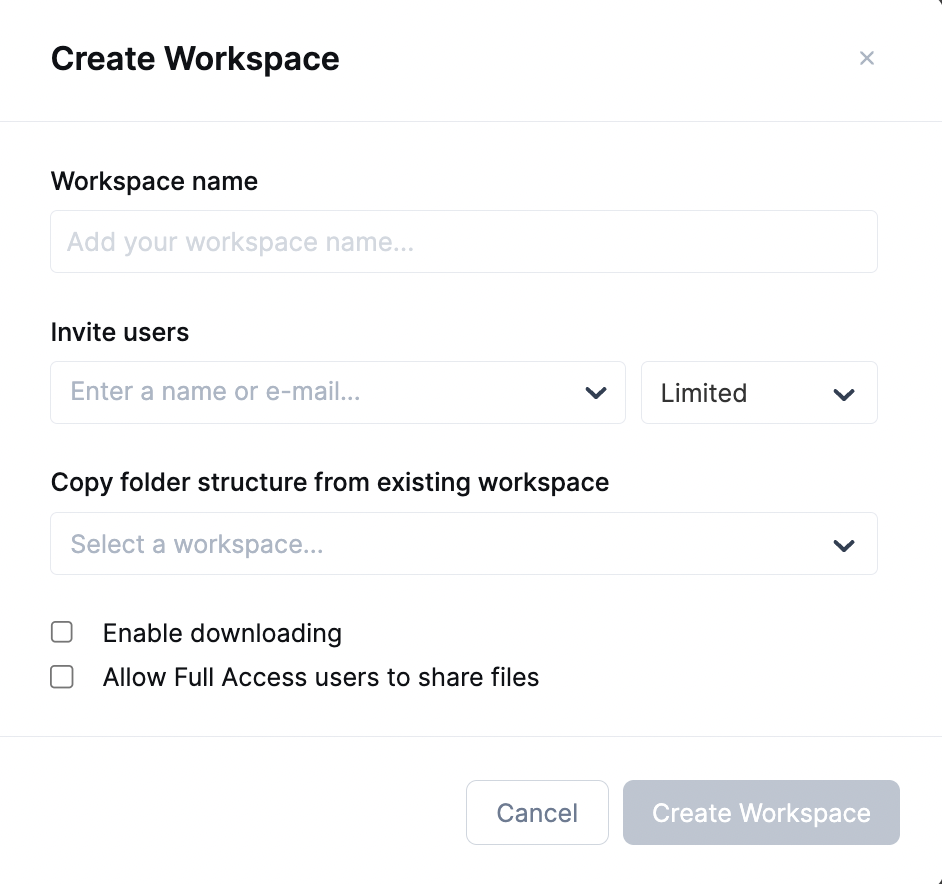
In the ‘Create Workspace’ modal, you can add a workspace name, invite users and set their permission levels, copy a folder structure from an existing workspace, enable file downloading, and allow full access users to share files.
You can maximize your CoLab setup by organizing your workspaces into folders. For example, if your company is planning to collaborate with external users in CoLab (i.e. with customers, suppliers, etc.), you may want to create folders to segregate your workspaces shared internally with your team vs. workspaces shared with external parties.
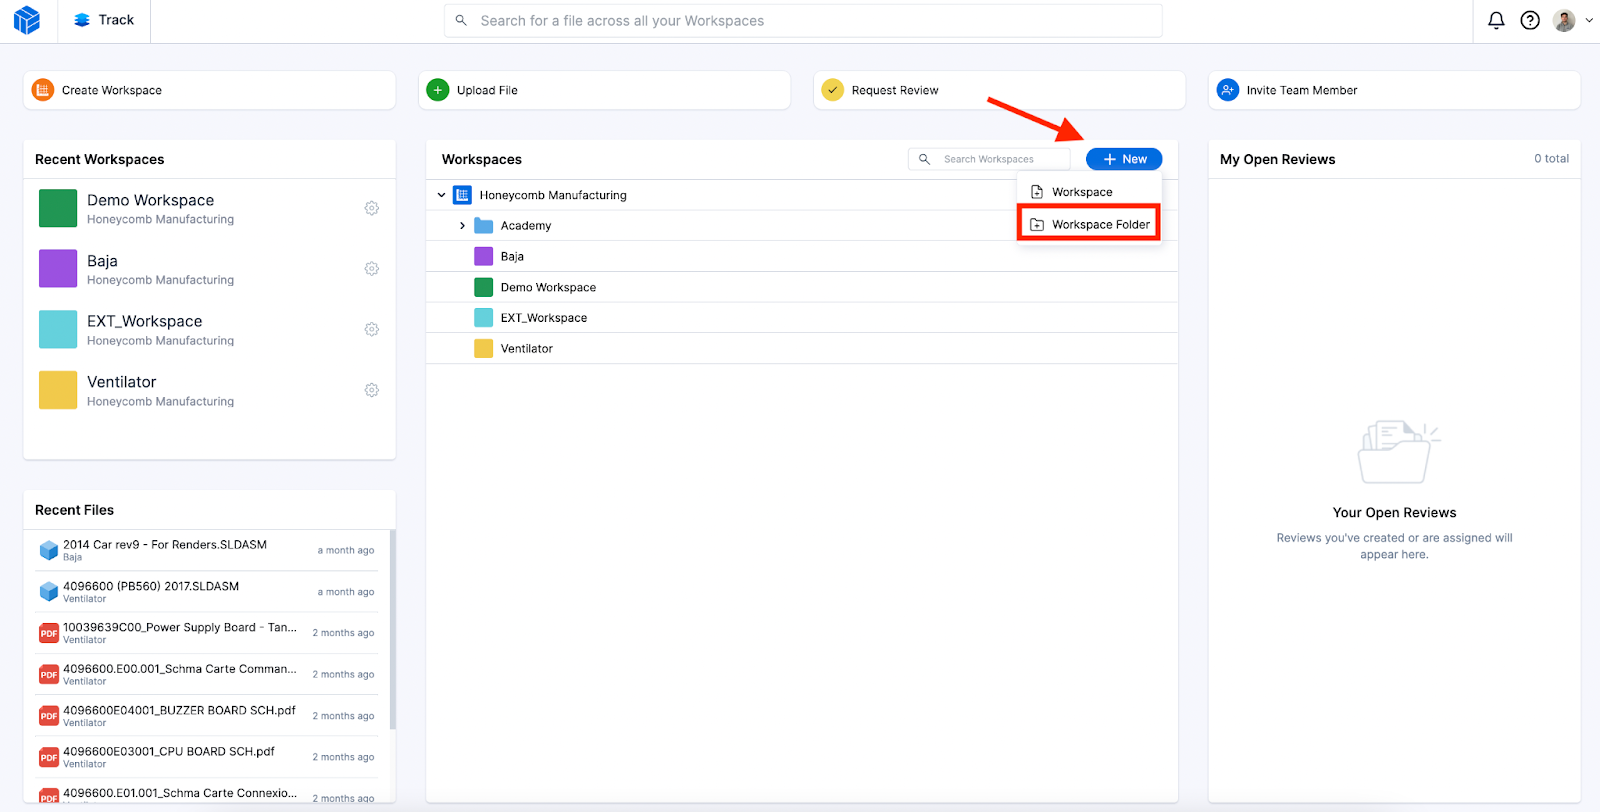
From the CoLab Start Page, click on the ‘+New’ button and select ‘Workspace Folder’ from the dropdown list. Type in the name of your workspace folder and click ‘Save’. Your saved workspace folder will display in the list of workspaces below. Any workspaces within that folder will be nested underneath that folder name.

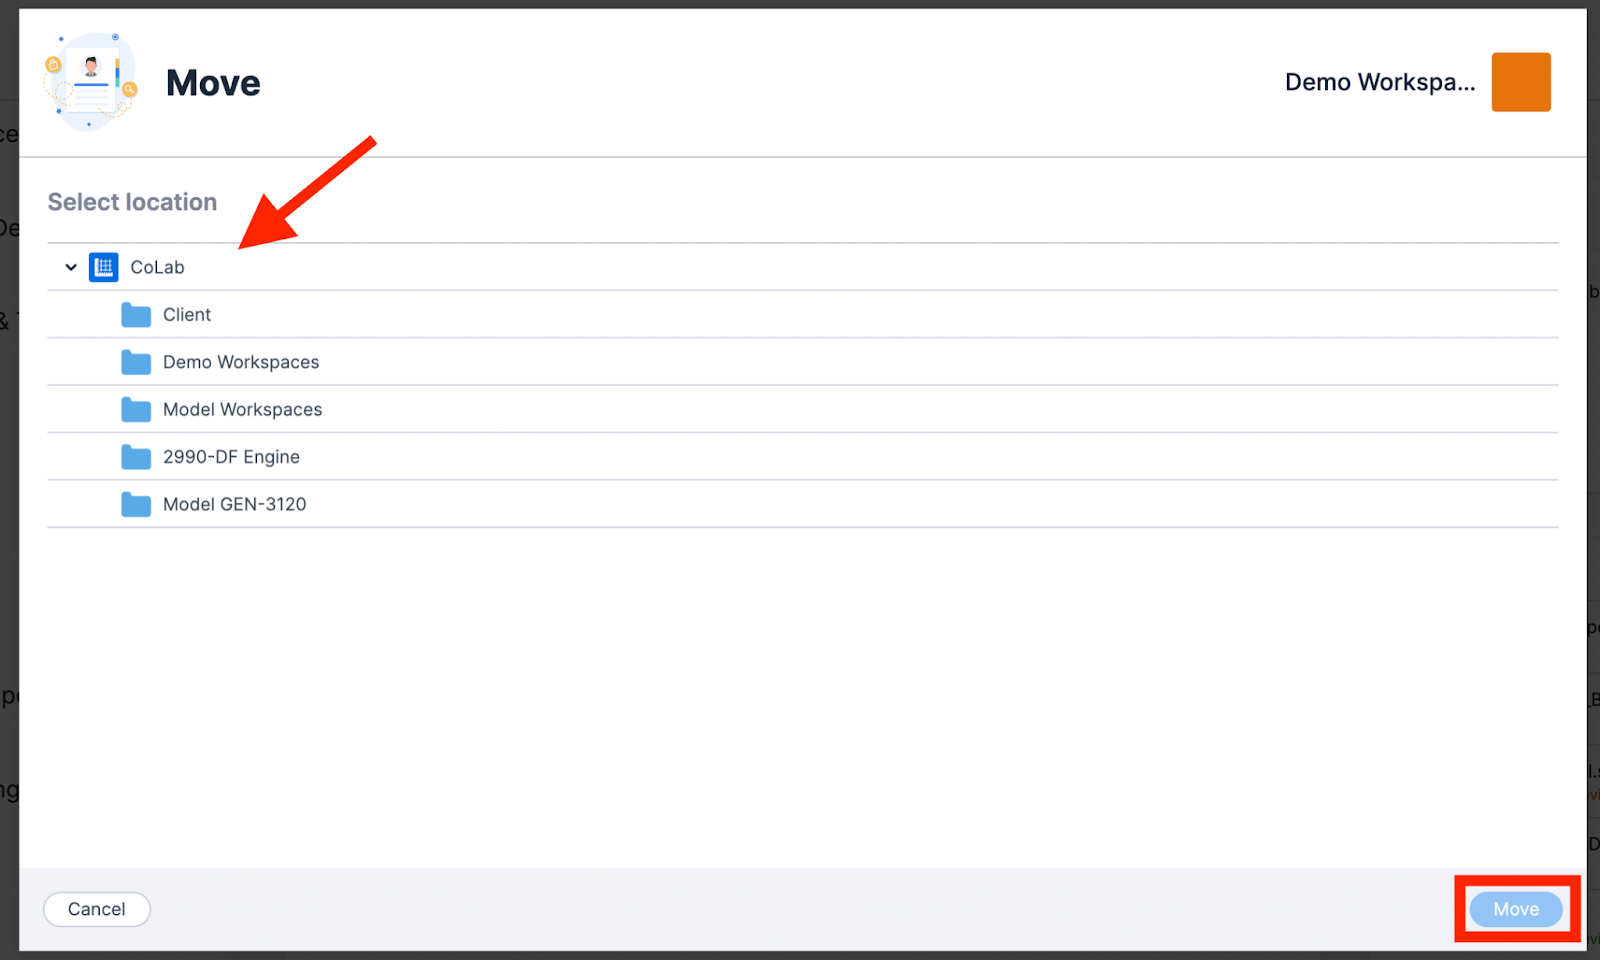
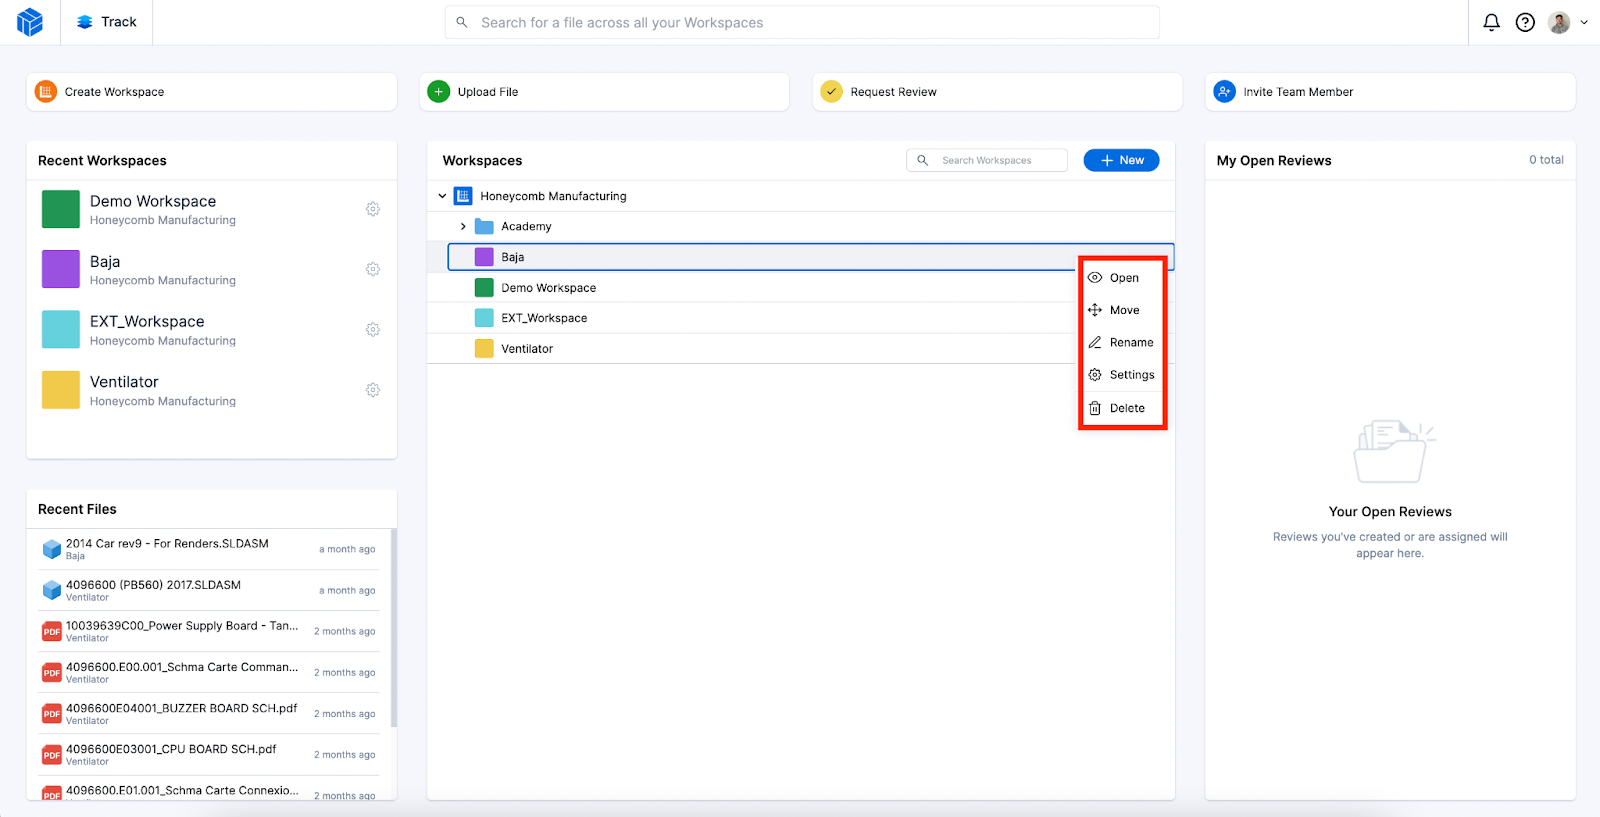
You can move workspaces into a folder by right clicking on the workspace name and selecting ‘Move’.
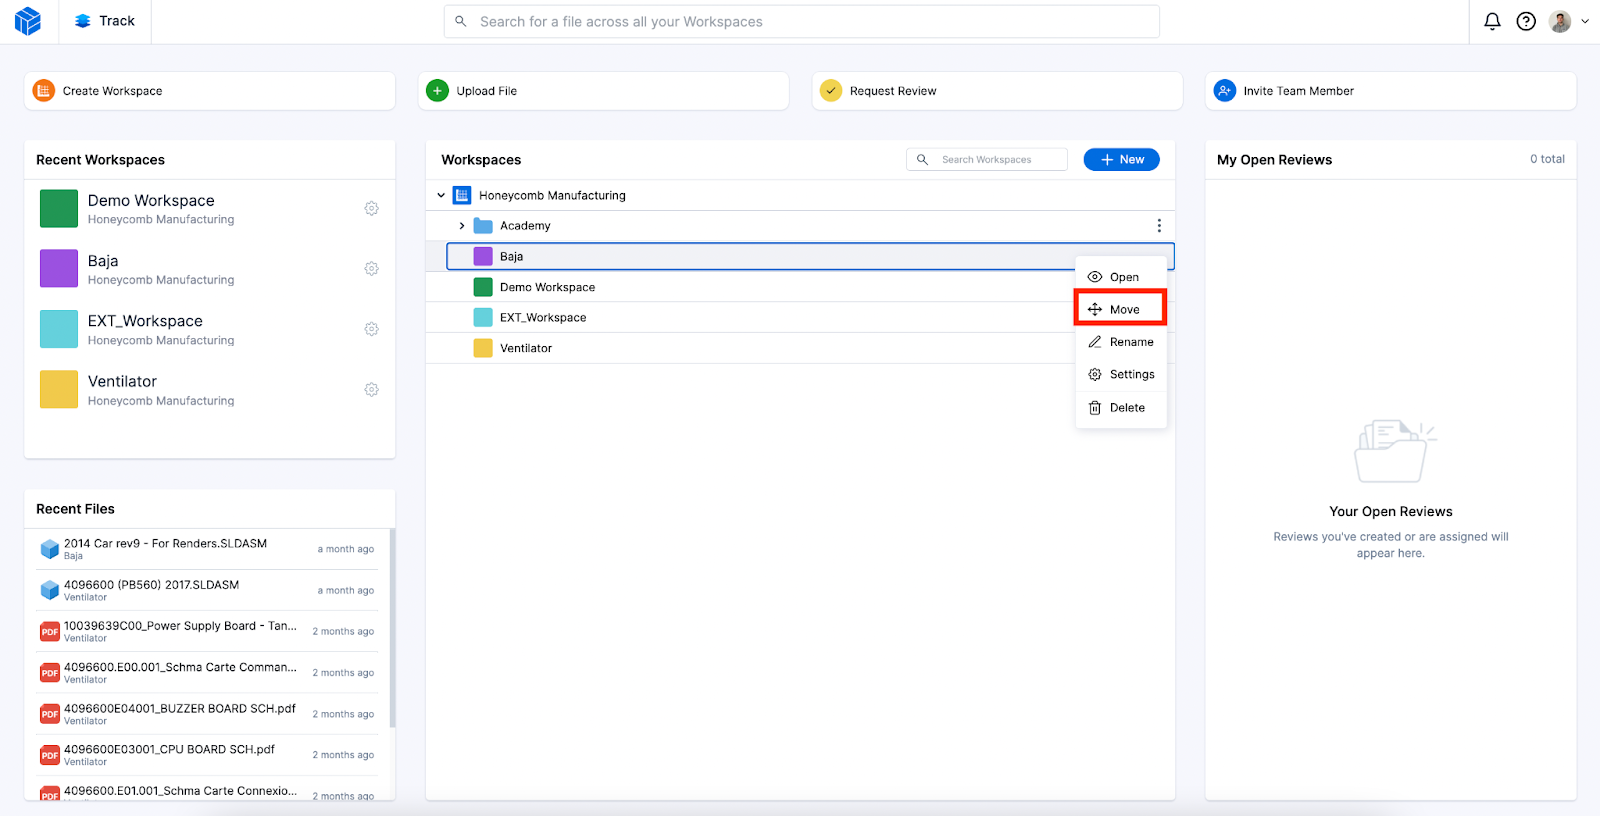
A modal will appear with the available folders where your workspace can be moved. Click on the desired folder and then select ‘Move’ in the lower right corner.
Once a workspace is created, you can start uploading files to the workspace. You can create folders to organize your files, and we recommend creating a structure based on your organization’s best practices. You’ll also need to invite any CoLab users that you would like to have access to the assets within that workspace. More information on workspace and file management can be found in the ‘File Management’ section of the CoLab knowledge base.
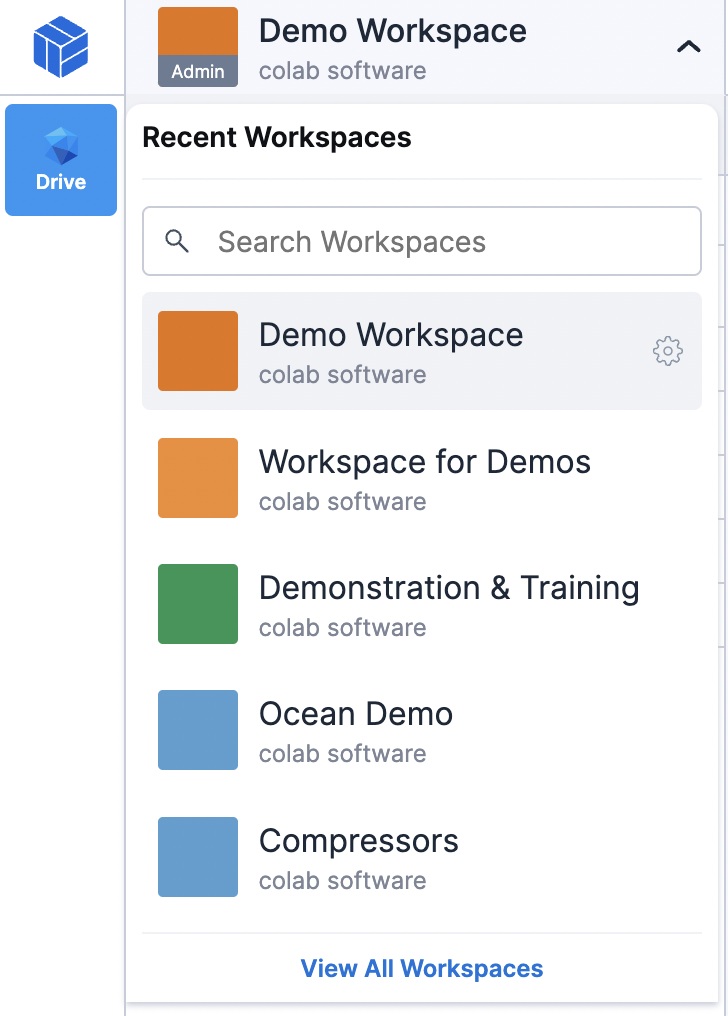
If you’re already inside a Workspace, click on the Workspace title in the top left corner to get back to the Workspace Navigator. With the Workspace Navigator open, you can view the Recent Workspaces which you have accessed, View All Workspaces, or Search Workspaces.
You can open, rename, view its settings, or delete a workspace by right clicking on the workspace name and selecting the preferred option. Note that you must be the workspace administrator in order to perform any of these actions.
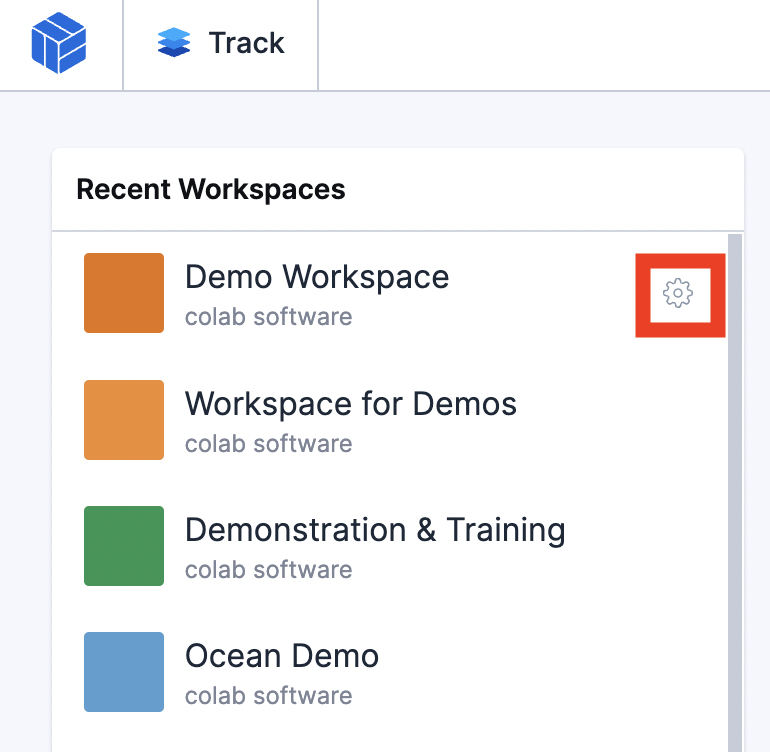
You can also view workspace settings by clicking the gear icon next to the workspace name in the ‘Recent Workspaces’ panel.
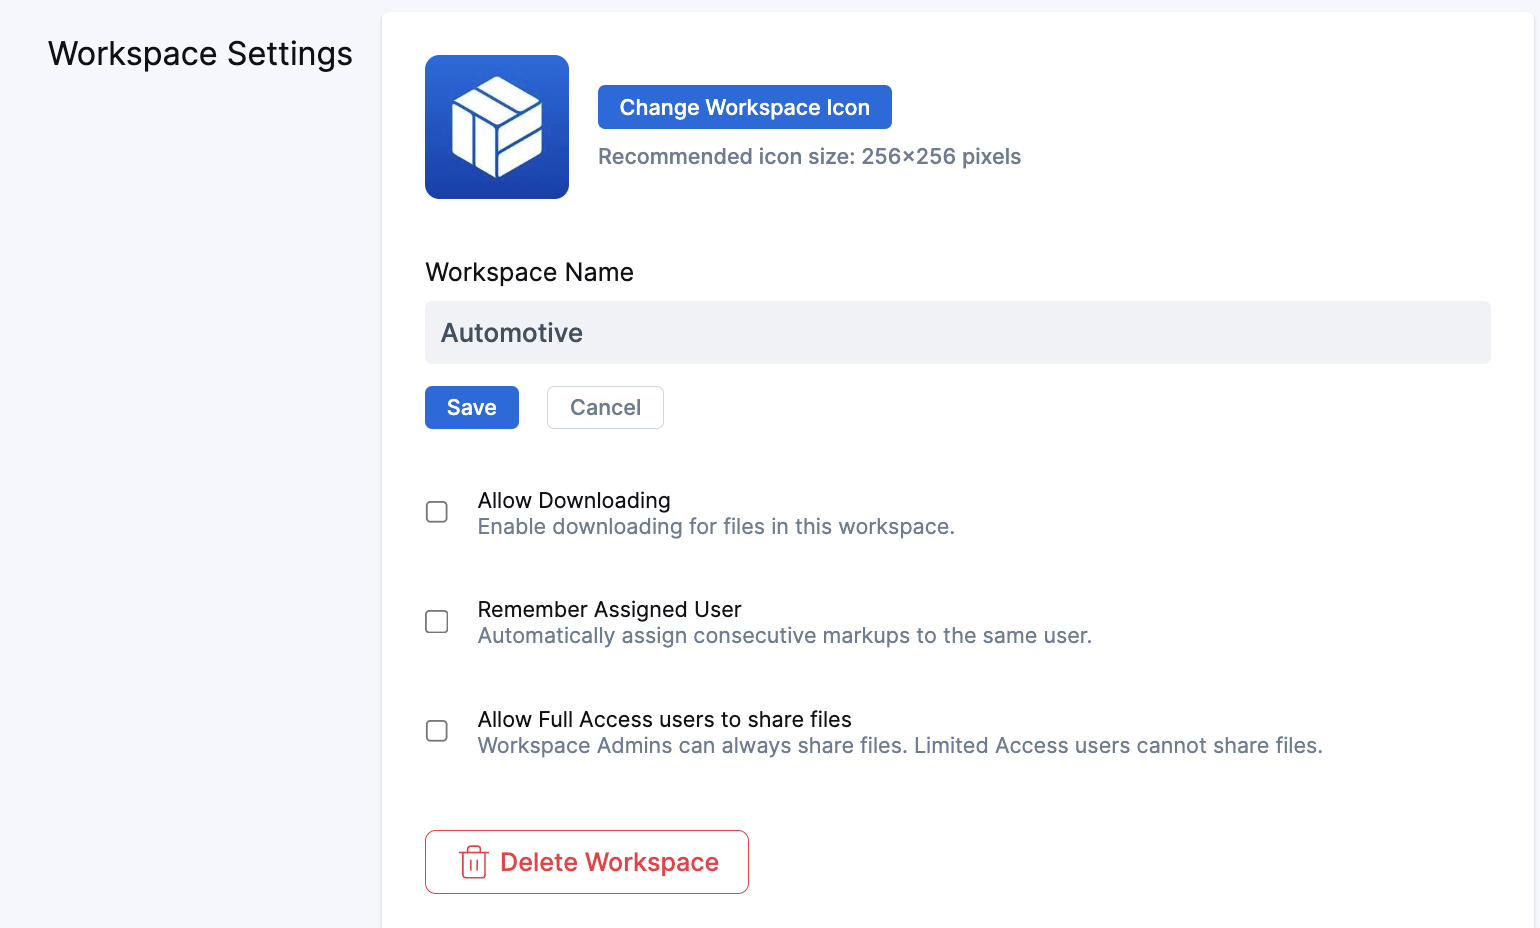
You can rename, enable file downloading, upload a workspace icon, remember an assigned user when leaving feedback, allow Full Access users to share files, and delete the workspace from the workspace settings page.
To complete a broader range of actions related to workspaces, you can navigate to the workspace management page by clicking the profile icon in the top right corner and select ‘My Profile.’
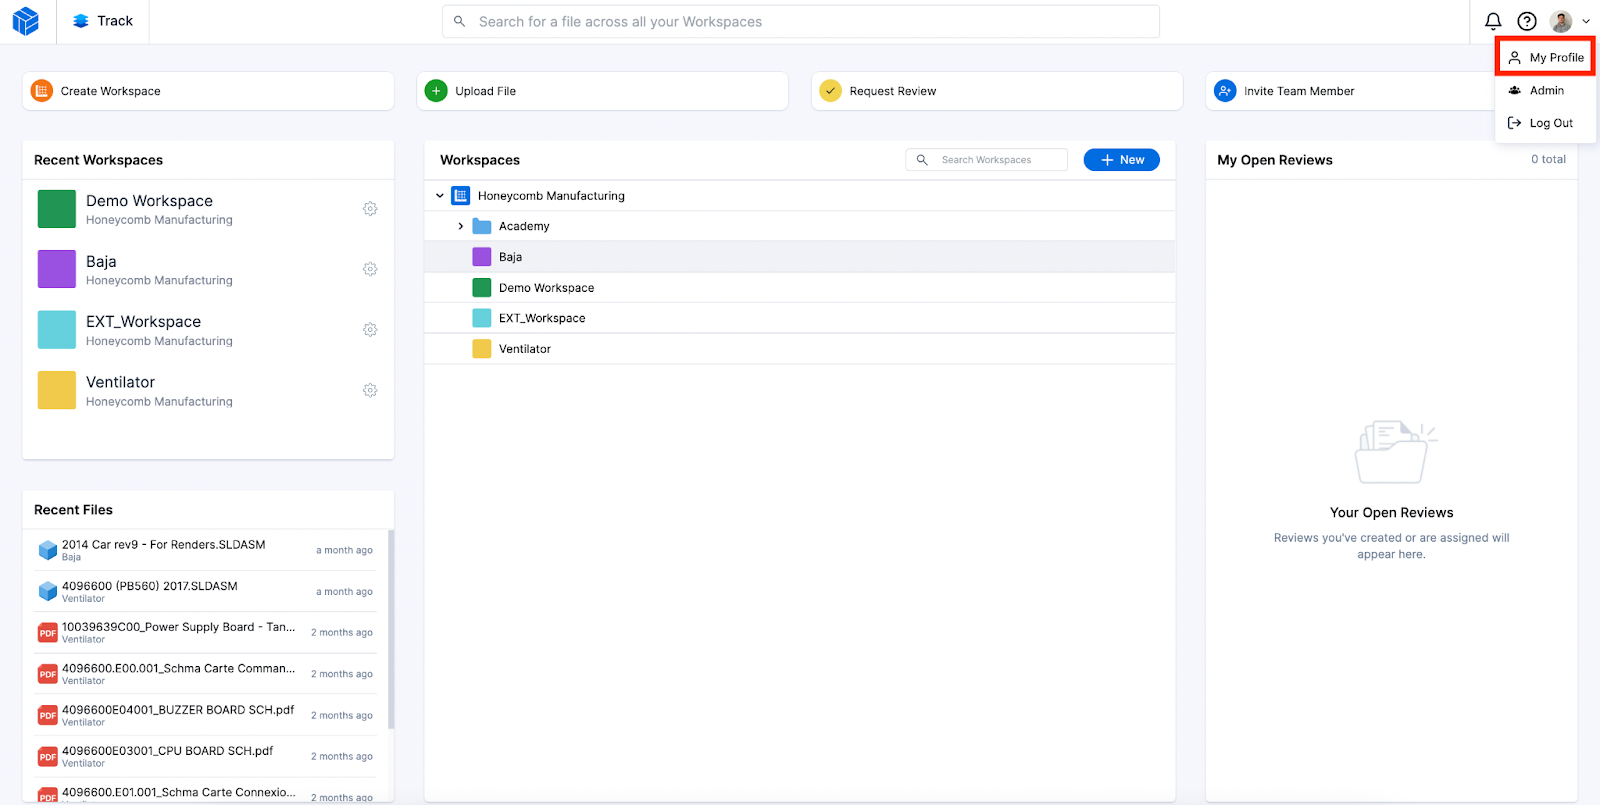
Click ‘Workspaces’ to navigate to the workspace management page.
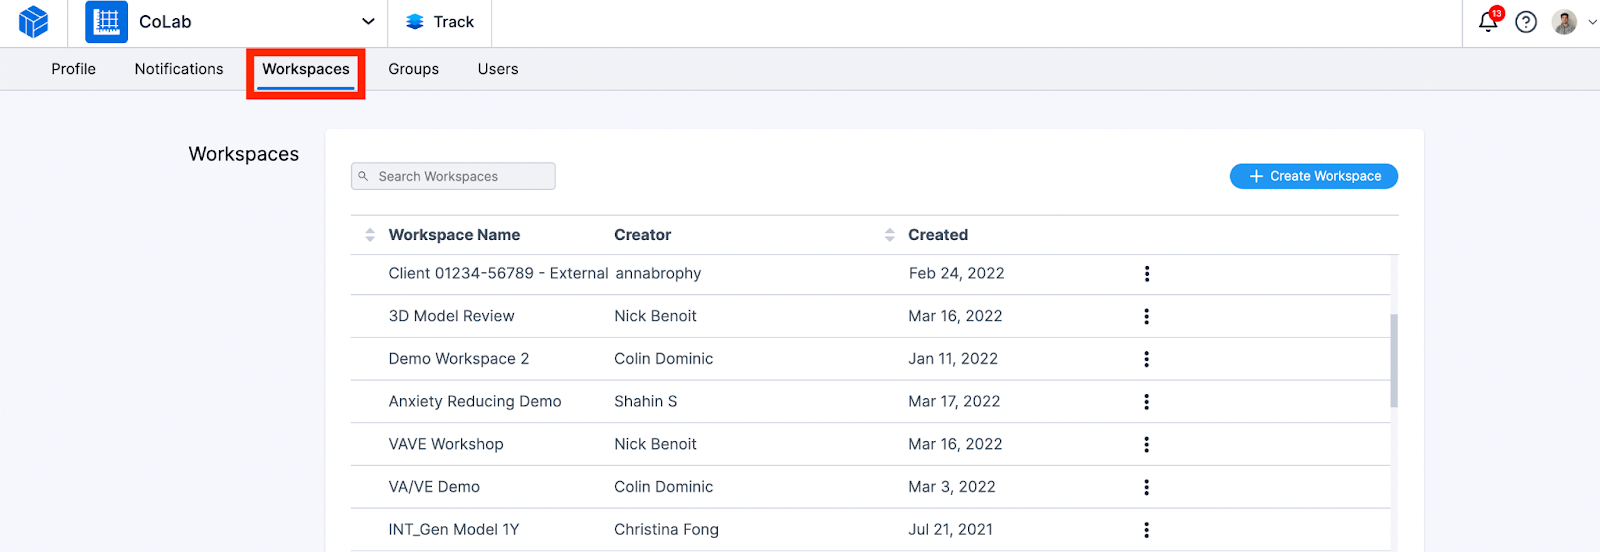
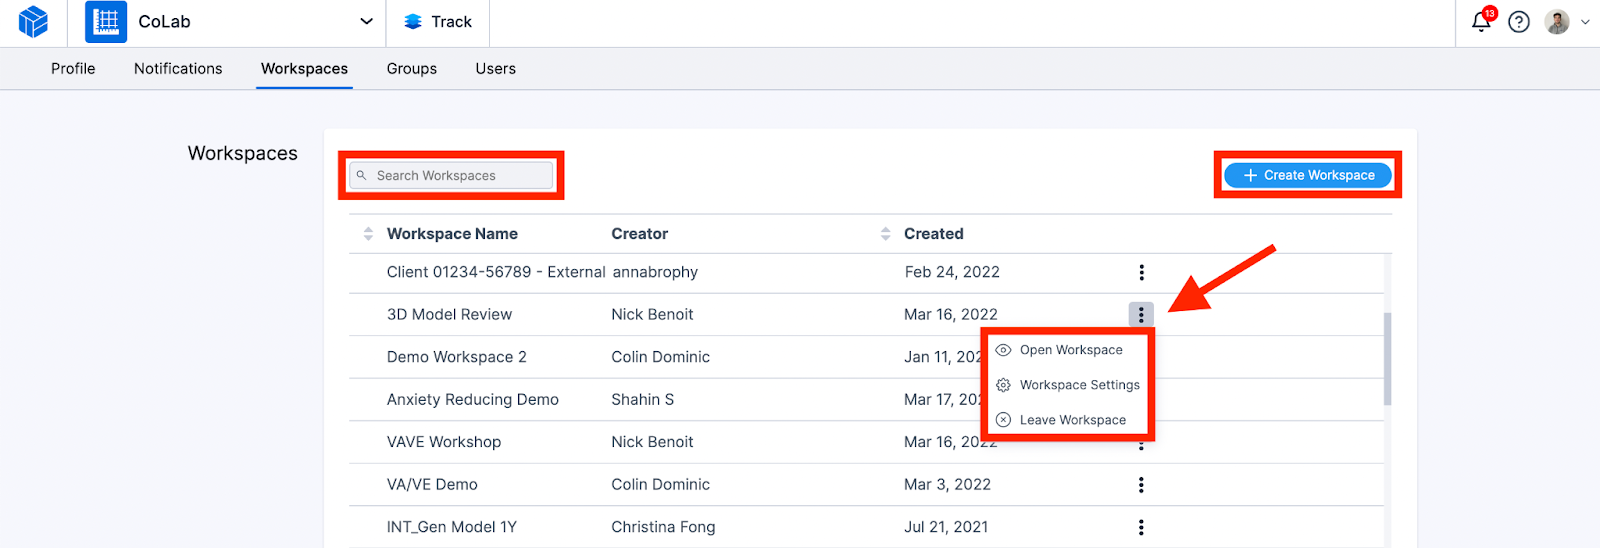
On this page you can search for and create workspaces. Clicking the icon to the right of the workspace allows you to open the workspace, access the workspace settings, and join the workspace. Note that only admins and creators of the workspace can access the workspace settings.
Enhanced Workspace Management
Hovering on a workspace or workspace folder will now show the user additional information including the Creator and creation date. The user will also have the option to open the workspace.
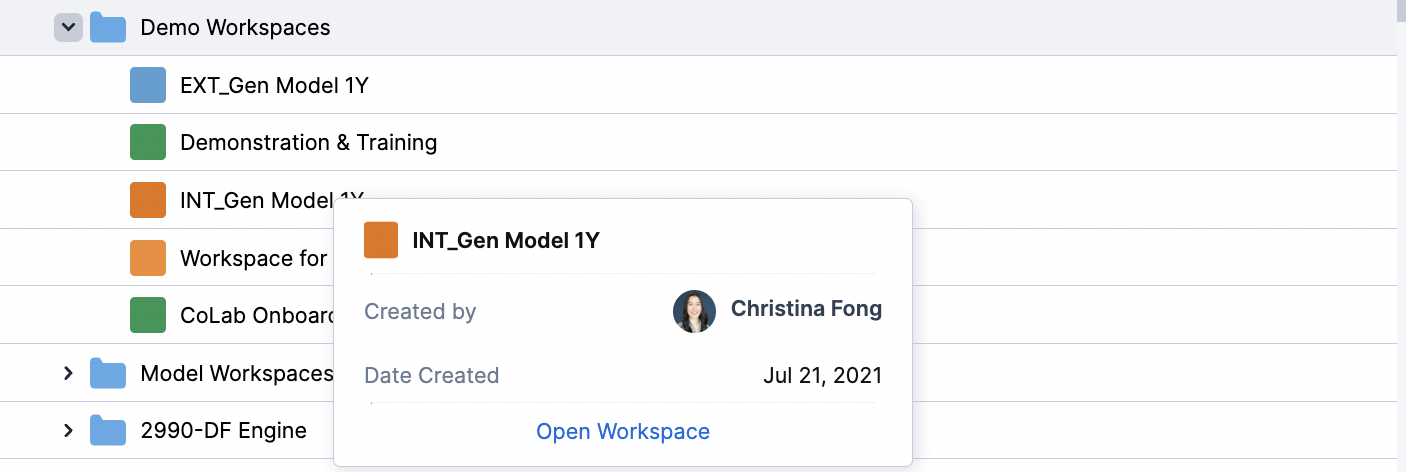
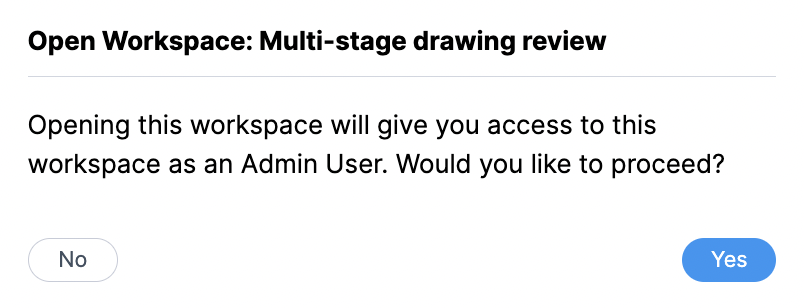
Company Admins will see all workspaces in CoLab even if they are not invited to them. These workspaces will be greyed out, but the company Admin can hover over them to view the workspace details. Clicking ‘Open Workspace’ will ask the company Admin if they want to access the workspace as an Admin user.

Need help determining your workspace and file structure? Reach out to us at support@colabsoftware.com and we’d be happy to help.